 Home and Gardening Ideas At home and Gardening ideas we believe inspiring readers about homesteading, self sufficiency
How to Custom Etch Glass Jars: 30 Minute DIY
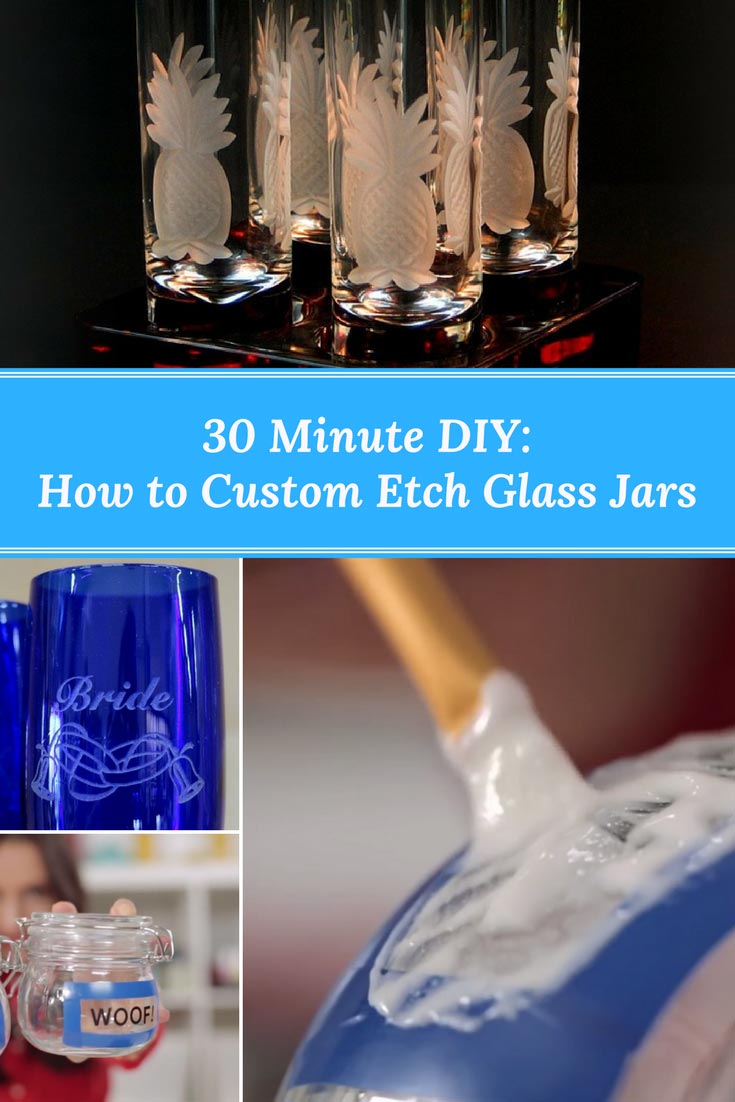
Expensive and unique crafts will catch your friends’ attention when they visit your home. They will always want to know where you bought them. On the other hand, custom-made crafts and gifts makes them wonder even more.
You can make your own custom etch glass jars and gift them to your friends and loved ones with it. You can also use these glasses to make that party, or event at your place more colourful. The tools are simple to use, and you can buy them at a very low price. It takes less than 30 minutes to come up with one.
So, let us jump right into making a custom etch glass jars.
Items needed:
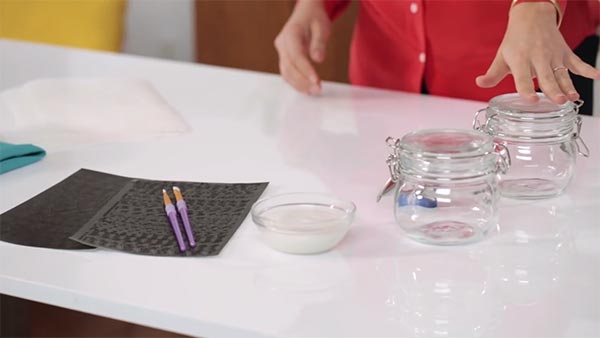
• Glass (Depends on how many glasses you need to etch. In the video, Britt Morin uses two glass jars) –> Get them here
• Vinyl adhesive letters –> Get them here
• Paintbrush- some recommend Popsicle sticks but function as well as paintbrushes –> Get them here
• Electrical tape –> Get them here
• Etching cream (Morin refers to it as the ‘magical solution’) –> Get them here
Procedure
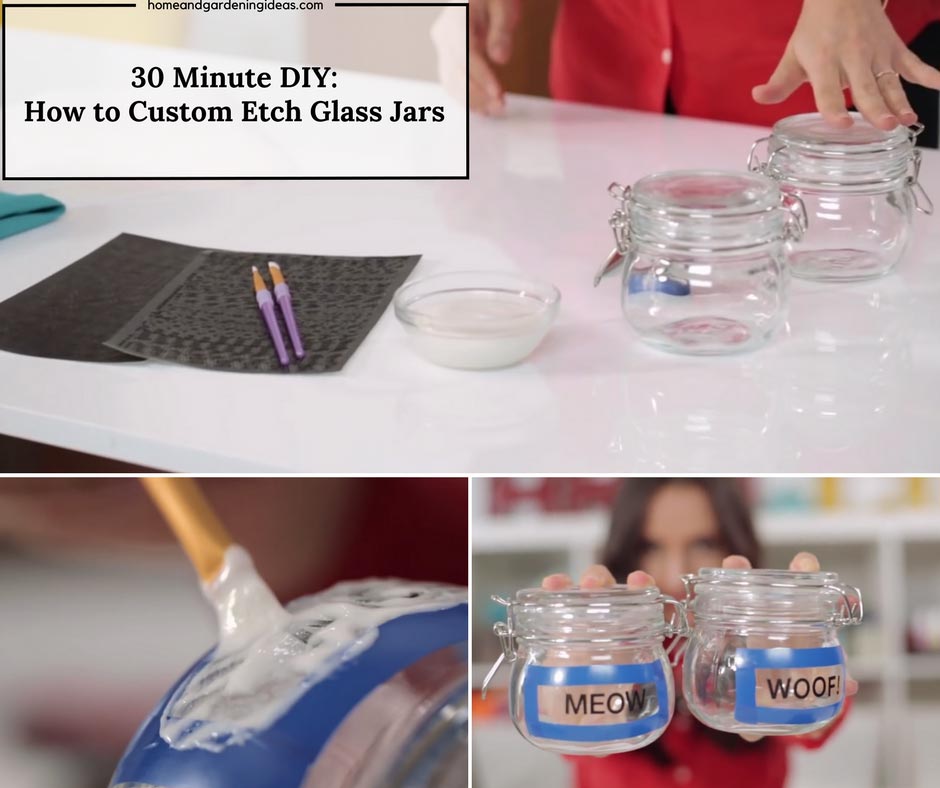
1. Clean your glass jar with some water to get rid of any fingerprints on the jar.
2. Then take your electrical tape and stick it on the glass jar to form a box shape. Make sure that you leave enough space in the middle to fit the letters.
3. Take the vinyl adhesive letters and take the letters that you want to use to form any word of your choice. For instance, your name or the name of your company. Take your time so that you correctly align the letters in the space between the tapes.
4. Grab your paintbrush and begin to apply the etching cream on the space in between the tape. Apply as much cream as you can so that it forms an even, thick and heavy layer.
5. Let the etching cream perch on the glass surface for about 20 minutes. This is to give room for it to become more solid.
6. After it solidifies, rinse of the etching cream with some water and a cloth.
7. Remove the tape and letters from the glass. You can use the cloth and water to wipe excess etching cream on the glass.
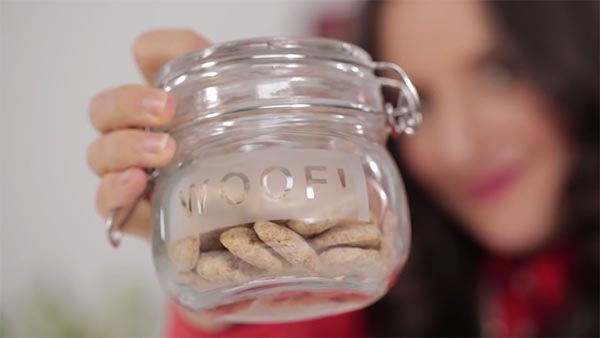
8. Your glass is now ready.
Conclusion and Tips
Before applying the etching cream, ensure that you press the letters firmly into the glass. If you are not careful, the cream will penetrate, and thus it would interfere with the design. The same case applies to the tape. Do not use your fingers to press the tape and letters to the glass. Instead, use a towel cloth.
Etching cream is acidic. Therefore, be careful while applying the cream since it can burn your fingers quickly. You can use a pair of gloves to protect you from any spill from the cream. Also, read the manufacturer’s instructions before using it.
You should ensure that the cream settles a bit longer. If you let it settle for a few minutes, the cream will not be visible.
Before you start etching the good glasses, start with glasses that you can throw without feeling any pinch. Use old glasses for practice purpose.