 Home and Gardening Ideas At home and Gardening ideas we believe inspiring readers about homesteading, self sufficiency
6 Ways to Preserve Your Fruit and Vegetable Harvest

It’s ok to admit it: canning is not always all it’s cracked up to be. It means a hot kitchen on what will probably be a hot day. It means clamps and jars and tongs and really big pressurizers. It means spending a whole day feeling like your in a sauna-like factory.
But what’s a clever DIYer with a green thumb to do when they’ve been blessed with a plentiful harvest? There’s no way your conscious could let these delicious and nutritious goodies go to waste. Luckily, when it comes to preserving our hard-fought harvest of fruits and vegetables, there are a lot of great (and simple) options.
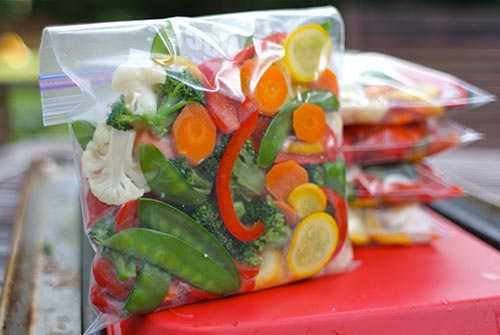
1. The freezer is your friend.
The process of freezing your food is not only very simple, it makes for a simple meal in the future. Get ready to fall in love with yourself over and over again throughout the year when you open the fridge to grab a batch of pesto or last fall’s apple sauce.
Have a pile of tomatoes that reaches a mile high? Perfect. Take an hour or so to gather them up, chop them, and make a huge batch of your favorite red sauce. Let it all cool down, and simply bag them up for freezing. Repeat with any of your favorite sauces and get ready for hassle-free and delicious eats in the coming months.
2. Utilize the dehydrator…or your oven
Have a ton of dried fruits with nowhere to go but to the flies? The dehydrator has you covered. The prep process will take you about 40 minutes from garden to dehydrator. Simply pick, cut, and layout on the many levels of the machine. Then, depending on the food, set the timer, kick your feet up, and get ready to eat smart and healthy on your own time.
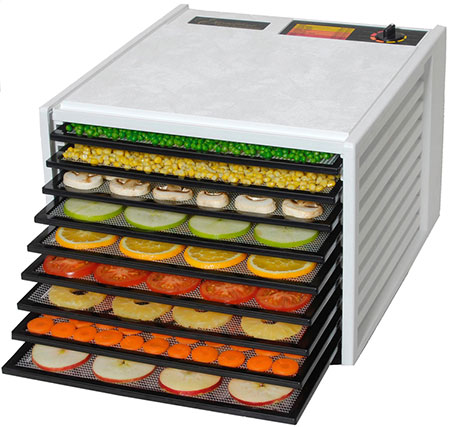
No dehydrator in sight? No worries. Setting your oven on its lowest possible temperature—no higher than 180 degrees fahrenheit— makes for great kale chips, sour cherry chews, apple crisps, oven-roasted tomatoes, and a bevy of dried and delightful citrus slices. Don’t know how your oven will perform? Depending on the food, higher temperatures will still be ok for dehydration. Give it a test run with a small batch first. Once you’ve found the right temperature, you’ll be snacking on and cooking with these treasures throughout the year.
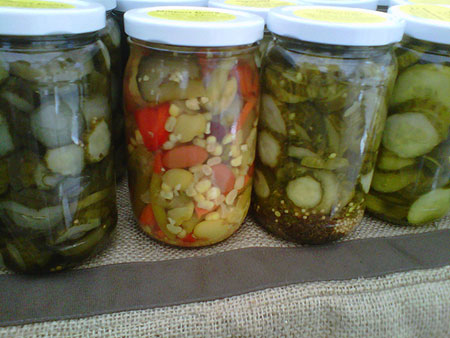
3. Pickle for the pinch.
Who doesn’t love a good pickle? If you have a particularly go-getter batch of cucumbers this year, pickling is a wonderful way to enhance your crop and to keep them all crispy and delicious. Don’t stop the fun with cucumbers! Tomatoes, beets, carrots, and almost anything you can try is worth the little time and effort that it takes to begin your pickling adventure.
Simply wash and chop your vegetables in any desired size and shape. You may want to blanch or briefly cook some vegetables in boiling water. This is best to do with carrots, beets, ginger, and other harder foods. Softies like tomatoes or cucumbers don’t need this extra attention. Next, you can arrange your veggies into jars. Mix and experiment with different combinations of herbs and veggies. Add some dried chile peppers, mustard seed, turmeric, cumin, celery seed, jalepeño pepper, oregano, or anything else you’d like to try.
After your ingredients are ready to go, it’s time to make a brine. This can be a sweet or sour brew depending on the sugar content. Basically, you’ll need about 3 cups of distilled white vinegar, 3 cups water, and a dash of salt and sugar (or in the case of sweet brines, about 1.5 cups sugar). Boil ingredients until all is dissolved and let cool. Once the brine is cool and ready, fill the jars, seal the lids, and refrigerate for at least a day.
5. Share your spoils with your neighbors (but before they spoil).

Admittedly, this tip is not a preservation method as much as a way to make new friends and avoid wasting any of your precious harvest. Summertime is when all of us are stretching our legs, soaking up some sun, and spending time outdoors, so make a point to say hello and share in the joys of summer by sharing your extra fruits and veggies. Chances are that even if they don’t have a green thumb to help them repay the favor, a batch of cookies may just find their way to your door in those cold winter months.
6. Ok, if you really want to can, go ahead and give it a shot.
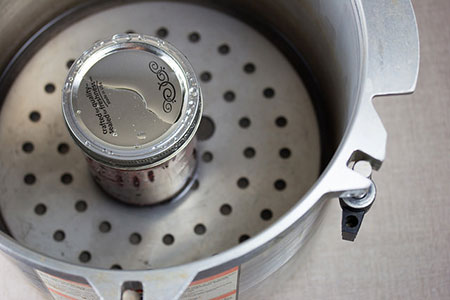
You have some options when it comes to canning: hot water or pressure canning. Decide on your method and check to make sure that the equipment you have matches, especially the lids of the jars. You’ll need a large pot, sterilized jars with lids and rings, a thermometer, tongs, your foods-to-be-canned, and a day that’s not sweltering hot.
For the hot water method, follow these hot but simple instructions: Get your hands on a trusty recipe and prepare your food to be canned. Then, fill your sterile jars, add the lid and ring, and tighten it. Your large pot should be about halfway full and 140-180 degrees Fahrenheit. You can then add your canned goods. Poor boiling water into the large pot and over the jars completely, bringing the whole pot to a lively boil. Check your recipe, and let the cans stand for the required amount of time. Once the timer rings, remove the jars with extreme caution as they are extremely hot, and check that all the seals are tight 24 hours later.
Foods low in acid must be canned by pressurization. For this method, you can skip the step of sterilizing jars and lids as they high heat will take care of any bacteria. The downside is you must have a pressure canner. This can be an expensive investment, so make sure you like canning before dropping the cash. Follow the directions that come with the canner to determine the appropriate amount of water. Set the jars in the pot then attach the lid and make sure it’s fastened and secure. The water should heat until steam flows and a hissing noise can be heard. This steam should keep flowing for 10 minutes, so turn up the heat if necessary. Then close the petcock and allow the jars to pressurize. Lastly, turn off the burner, let the pressure drop to normal levels, and use caution when removing the hot contents. Make sure to consult your recipe and the instructions of your pressurizer.