 Home and Gardening Ideas At home and Gardening ideas we believe inspiring readers about homesteading, self sufficiency
Smoking Meat – Get Professional Results At Home
Smoking Meat – Get Professional Results at Home
Smoking meat isn’t just cooking—it’s an art form that dates back thousands of years. From the first cavemen charring meat over open flames to today’s backyard pitmasters, the process has evolved into a delicious blend of science and tradition.
Think about it—smoke is what gives grilled burgers, ribs, and chicken that unmistakable, mouthwatering aroma at summer cookouts. It’s what makes Easter hams so rich in flavor and color. And bacon? Well, let’s just say smoked bacon deserves a category of its own! 😋
For years, perfecting smoked meat was reserved for those with expensive commercial smokers or dedicated smokehouses. But today, with the right techniques, you can achieve professional-level results right in your own kitchen or backyard! Whether you have a simple charcoal grill or just an oven, you can master the art of smoking meat with ease.
🔥 The Secret to Perfect Smoke: The Pellicle Principle
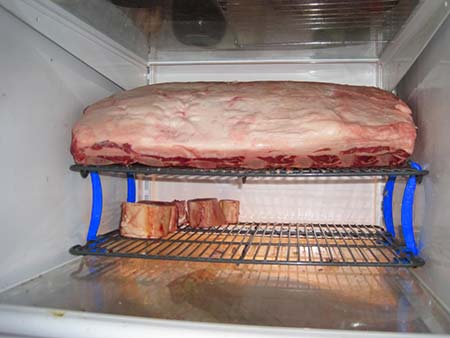
Before diving into the smoking process, let’s talk about the pellicle—a critical step that most beginners overlook!
A pellicle is a slightly tacky surface that helps the smoke adhere to the meat, enhancing both flavor and color. To create one, simply place your meat uncovered in the refrigerator overnight. This drying process removes excess moisture and primes the surface for maximum smoke absorption.
Pro Tip: Never smoke wet meat—it won’t absorb the smoky goodness properly!
🏠 The Oven Smoking Method – Easy & Foolproof

No smoker? No problem! Your oven can double as a smoke chamber with just a few simple steps. Here’s how:
What You’ll Need:
✔️ Wood chips (apple, hickory, mesquite, or oak) ✔️ An aluminum pan ✔️ A raised baking rack ✔️ Aluminum foil ✔️ Meat of your choice
Step-by-Step Guide:
1️⃣ Soak the Wood Chips: Submerge them in water for at least one hour. This prevents them from burning too quickly. 2️⃣ Preheat the Oven: Set it to 250°F (120°C)—the ideal temperature for low-and-slow smoking. 3️⃣ Prepare the Smoking Setup:
- Drain the wood chips and spread them in a single layer inside an aluminum pan.
- Place a raised baking rack over the chips. 4️⃣ Position the Meat: Set your meat directly on the rack above the wood chips. 5️⃣ Create a Smoke Tent: Cover the setup with aluminum foil, sealing the edges tightly while leaving space for smoke circulation. 6️⃣ Smoke the Meat: Let it cook 3–6 hours, depending on the type and thickness of your meat. 7️⃣ Keep the Chips Moist: Check periodically and add reserved soaking water if needed. 8️⃣ Check the Internal Temp: Use a meat thermometer to ensure it’s perfectly cooked.
Once done, remove your masterpiece and enjoy! 🍖
🔥 The Grill Smoking Method – Authentic & Flavorful
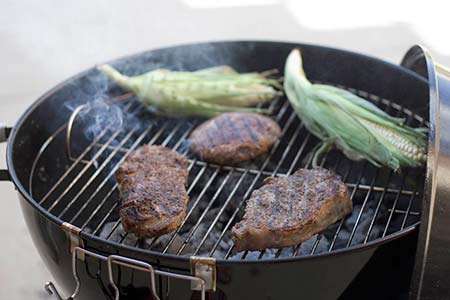
If you prefer classic smoked flavor, a charcoal grill is your best friend. The key? Low heat, indirect cooking, and the right wood chips.
What You’ll Need:
✔️ Charcoal (hardwood & briquettes for steady heat) ✔️ Wood chips (soaked for at least one hour) ✔️ A chimney starter ✔️ Aluminum foil (for a DIY smoker box) ✔️ Meat of your choice
Step-by-Step Guide:
1️⃣ Prep the Charcoal: Use a chimney starter to heat up your charcoal. Once it’s covered in light gray ash, push the coals to one side of the grill. 2️⃣ Create Indirect Heat: Your meat should cook on the cool side of the grill, away from direct flames. 3️⃣ Prepare the Wood Chips:
- Soak wood chips for at least an hour.
- Wrap them in aluminum foil and poke a few holes to allow smoke to escape. 4️⃣ Add Smoke: Place the foil-wrapped wood chips directly on the hot coals. 5️⃣ Place the Meat: Position it on the cool side of the grill and close the lid. 6️⃣ Monitor & Adjust: Keep an eye on the grill temperature, the wood chip moisture, and the meat’s internal temperature. 7️⃣ Refuel as Needed: Add fresh coals and soaked wood chips periodically to maintain consistent smoke.
After a few hours of patience and anticipation, your smoky, tender meat will be ready to devour! 🤤
🎯 Final Tips for Smoking Success
✔️ Be Patient – Smoking is a slow process, but the results are worth it! ✔️ Experiment with Different Woods – Each type adds a unique flavor. Try mixing woods for a custom taste! ✔️ Use a Meat Thermometer – Precision matters. Undercooked or overcooked meat can ruin the experience. ✔️ Don’t Overdo the Smoke – Too much can make your meat bitter. Aim for a steady, thin stream of smoke. ✔️ Let it Rest – Once done, allow your meat to rest for at least 10–15 minutes before slicing.
Now, you’re ready to smoke meats like a pro—whether in the oven or on the grill! 🔥 So fire up those wood chips and impress your friends and family with mouthwatering, smoky goodness.
Happy Smoking! 🍖🔥