 Home and Gardening Ideas At home and Gardening ideas we believe inspiring readers about homesteading, self sufficiency
Making Colby Cheese at Home

Colby cheese is similar to Cheddar with a delicious flavor people love. It is one of the original American cheeses that is slowly gaining popularity with at-home cheesemakers. If you are new to making cheeses, Colby is a good choice because it is quick and easy. Unlike other cheeses, Colby only requires four to six weeks of aging. Other picks can take months to age!
Another difference is that Colby uses homogenized milk that is pasteurized at the higher end of the milk spectrum. It isn’t the common type of milk we use, but it means that you can make cheese with any milk you purchase from the grocery store.
Ingredients for Colby Cheese at Home
- Two Gallons Whole Milk
- ½ packet C101 Mesophilic Culture
- ¼ TSP Calcium Chloride
- ½ TSP Single Strength Liquid Rennet
- ¼ TSP Annatto Cheese Coloring
- 2lbs Cheese Salt (for Brine)
Equipment Needed
- 10+ Quart Stainless Steel Pot
- Quality Thermometer
- Knife
- Slotted Spoon
- Large Colander
- 1 M3 Hard Cheese Mold
- Butter Muslin
- Cheese Press (or weights equal to 50lbs)
- Cheese Mat
- Cheese Wax
13 Steps for Making Colby Cheese at Home
1- The first step is to heat the milk up to 86 F. You can do this by putting the milk in a pot or sink of very warm water. If you want to warm the milk on the stove, make sure you do so slowly to avoid overheating. Stir.
2- Add in the calcium chloride and annatto before the culture. Rinse your spoon well afterward.
3- Colby is a sweeter cheese, so only half the packet of culture is necessary. A slow acid development and fewer cultures will create the sweetness needed. Make sure to store the other half of your packet in the freezer so you can use the culture for another batch. Don’t let it go to waste! Add the culture to the milk once it’s at the appropriate start temperature. To avoid clumping, sprinkle the culture over the surface and let sit for two minutes, then stir. Allow the milk to rest for an hour to let the culture wake.
4- Add ½ TSP of single strength liquid rennet. The milk should sit for 45 minutes. You should notice the milk firming up around 15 minutes, but it needs to wait another 30 minutes so you can cut the curd. If the curd isn’t firm enough after 45 minutes, wait another 10 minutes.
5- You know the curd is ready to cut when it shows an even break with a knife. Go slowly and cut into ½” cubes. It might shatter into smaller pieces but go slowly.
6- Next up is to dry out the curds. Slowly increase the heat to 102 F, which should take around 30 minutes. Then, you can stir the curds while holding the temperature for 15 to 30 minutes. Once they are cooked, make sure to check that enough moisture is removed. The curd should be firm throughout and have a moderate resistance between your fingers. Now, you can let the curds settle under the whey.
7- The next step is one of the most important! The curds are now at the bottom of the pot at 102F. We need to remove the whey, which removes the food source for any bacteria. Then, we are going to cool the curds to create an environment that bacteria doesn’t like.
8- Remove the whey down to the level of the curds and add water at 75F as the curds cool. Let them settle and remove the whey down to the curds. Then, add very cold water until the curds are at 75F. Stir the curds at this cooler state for 15 to 30 minutes.
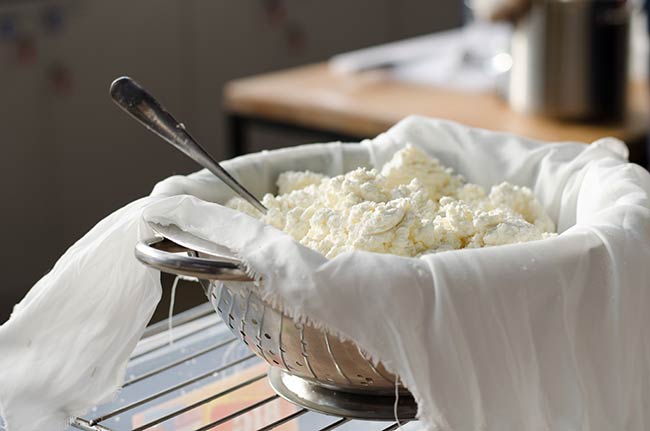
9- Transfer the curds to a colander lined with butter muslin. Stir gently to ensure the whey drains off. Now, transfer the curds to a sanitized muslin lined mold. You want to pack the curds in using hand pressure. Then, pull the cloth up evenly all around the form to prevent wrinkles. Fold over the top and put the follower on top.
10- Pressing is the next step. You start off lightly and increase the press weight from 10lbs at 15 minutes to 20lbs at 30 minutes. Increase the weight to 40lbs at 90 minutes, then leave 50lbs on overnight. You won’t see a stream of whey coming out. It will be slow drops. Soon, the drops will stop, and then increase the weight until you reach 50lbs. Each time, you should unwrap, turn, rewrap and put the cheese into the press.
11- The next day, remove the cheese from the press. You should have a wheel of cheese with no surface openings! The surface shouldn’t feel sticky. Prepare the brine, which is one gallon of water with 2lbs of salt, 1 TBSP of calcium chloride, and 1 TSP white vinegar.
12- Place the cheese into the brine and let sit for eight hours. The cheese will float to the surface, so sprinkle a bit of extra cheese on the surface. Make sure to flip the cheese and add more salt halfway through the brining period.
13- After brining, wipe the surface of the cheese and let it set on a dry surface for a day or two.

14- Now it is time to wax! Store the cheese in a location at 52 to 56F with 80 to 85% humidity. Let age for four to six weeks before serving.
TRADITIONAL HOMEMADE CHEESE
Homemade Colby Cheese
Make traditional Colby cheese at home from whole milk using mesophilic culture, rennet and a washed-curd method that creates Colby’s characteristically mild, slightly sweet flavour.
Ingredients
- 2 gallons whole milk
- ½ packet C101 mesophilic culture
- ¼ teaspoon calcium chloride
- ½ teaspoon single-strength liquid rennet
- ¼ teaspoon annatto cheese colouring
For the Brine
- 1 gallon water
- 2 lbs cheese salt
- 1 tablespoon calcium chloride
- 1 teaspoon white vinegar
Equipment Needed
- 10+ quart stainless-steel pot
- Accurate dairy or kitchen thermometer
- Long knife for cutting curds
- Slotted spoon
- Large colander
- M3 hard cheese mold or similar suitable mold
- Butter muslin
- Cheese press or suitable pressing weights up to 50 lbs
- Cheese mat
- Food-grade cheese wax
13 Steps for Making Colby Cheese
-
Heat the Milk.
Slowly warm the milk to 86°F (30°C).
You can place the pot in a sink or larger container of warm water, or heat it very gently on the stove. Stir regularly and avoid overheating the milk. -
Add Calcium Chloride and Annatto.
Add the calcium chloride and annatto colouring to the warmed milk and stir thoroughly.
Rinse or clean your stirring utensil afterward. -
Add the Mesophilic Culture.
Sprinkle ½ packet C101 mesophilic culture evenly over the surface of the milk.
Allow it to sit for about 2 minutes so it can rehydrate, then gently stir it thoroughly into the milk.
Cover and leave the milk undisturbed for approximately 1 hour. -
Add the Rennet.
Add ½ teaspoon single-strength liquid rennet and stir according to the rennet manufacturer’s directions.
Cover the pot and leave the milk undisturbed for approximately 45 minutes.
If the curd is still too soft to cut cleanly, allow another 10 minutes before checking again. -
Cut the Curds.
Check for a clean break by inserting a knife into the curd and gently lifting.
Once sufficiently firm, slowly cut the curd into approximately ½-inch cubes.
Work gently to avoid unnecessarily shattering the curds. -
Cook the Curds.
Slowly increase the temperature of the curds and whey to 102°F (39°C) over approximately 30 minutes.
Stir gently as the temperature rises.
Once at 102°F, continue gently stirring and holding the temperature for another 15 to 30 minutes.
The finished curds should feel firmer and offer moderate resistance when gently pressed between your fingers. -
Allow the Curds to Settle.
Stop stirring and allow the curds to settle beneath the whey.
Carefully remove whey until the liquid level is approximately level with the curds. -
Wash and Cool the Curds.
Add water at approximately 75°F (24°C) while gently stirring the curds.
Allow them to settle again and remove more whey.
Add colder water as necessary until the curds reach approximately 75°F (24°C).
Stir the cooled curds for another 15 to 30 minutes. -
Drain and Mold the Curds.
Transfer the curds into a large colander lined with butter muslin.
Stir gently while the excess whey drains away.
Transfer the drained curds to a sanitized muslin-lined cheese mold. Pack them gently using hand pressure.
Pull the cloth evenly around the cheese to reduce wrinkles, fold the cloth across the top and fit the mold follower. -
Press the Cheese.
Press using the following approximate schedule:
- 10 lbs for 15 minutes
- 20 lbs for 30 minutes
- 40 lbs for approximately 90 minutes
- 50 lbs overnight
Whey should generally drain gradually rather than pouring continuously from the mold. -
Prepare the Brine.
The following day, remove the cheese from the press.
The wheel should have a reasonably smooth, closed surface without obvious openings.
Prepare the brine by combining: 1 gallon water, 2 lbs cheese salt, 1 tablespoon calcium chloride and 1 teaspoon white vinegar. -
Brine the Cheese.
Place the cheese into the prepared brine and leave it for approximately 8 hours.
The cheese may float, so sprinkle a little additional cheese salt over the exposed surface.
Halfway through the brining time, flip the cheese and lightly salt the newly exposed surface. -
Dry the Cheese.
Remove the cheese from the brine and wipe away excess moisture.
Place it on a clean cheese mat and allow the surface to air-dry for approximately 1 to 2 days, turning periodically.
The exterior should be dry before proceeding to waxing.