 Home and Gardening Ideas At home and Gardening ideas we believe inspiring readers about homesteading, self sufficiency
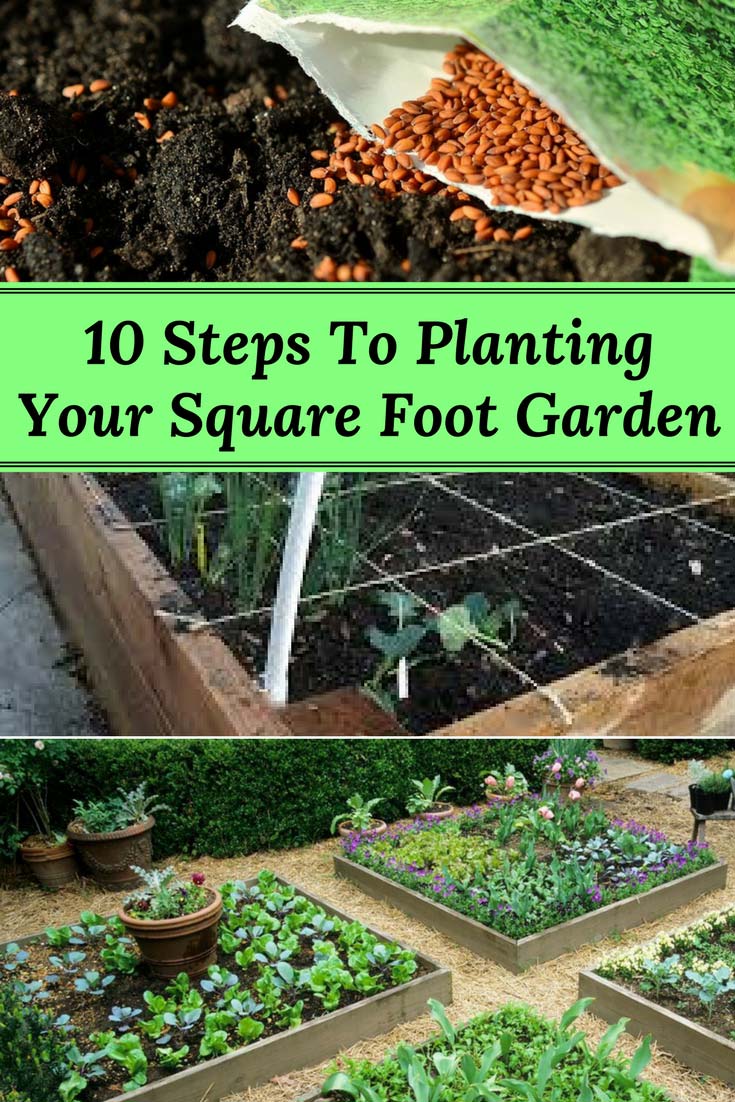
10 Steps to Planting Your Square Foot Garden
Maybe you are an avid gardener, looking to increase yield despite your limited gardening space. Or maybe you self-identify as gardening challenged and square foot gardening has piqued your interest because it sounds less overwhelming than traditional gardening. Either way, square foot gardening might be just what you’re looking for. It really does not have to be that hard to maintain, and benefit from, a garden if you start small. You’re probably wondering how small we’re talking…Well, do you have 4 square-feet of viable outdoor space? If the answer is yes, then you have enough space to garden.
So, what exactly is a square foot garden and how does it work? Well, as you might surmise from the name, a square foot garden is a lot like a traditional garden only condensed into a 4’ x 4’ box. The box is further sectioned off into smaller squares to easily visualize and apportion growing space for each plant. Think of square foot gardening as a small space, high yield method for optimally practical and efficient gardening.
If you think that you can’t garden, think again. Square foot gardening is a wonderful gateway to full-scale gardening, perfect for those who feel overwhelmed by the prospect of caring for a full-scale garden. It’s also perfect for introducing the basic concepts and techniques of gardening to children. Due to its small scale, it’s even a great alternative for gardeners in their elder years who might struggle with the physical demands of a large garden. Check out squarefootgardening.com for more information.
You should try square foot gardening because it is…
- Economical: less space means fewer resources required
- Easy: it eliminates the need for weeding, digging and tilling
- Practical: it requires up to 80% less space
- Satisfying: you decide what to grow and how to grow (go pesticide free!)
- Productive: you can yield 5 times more produce
How much should you plant?
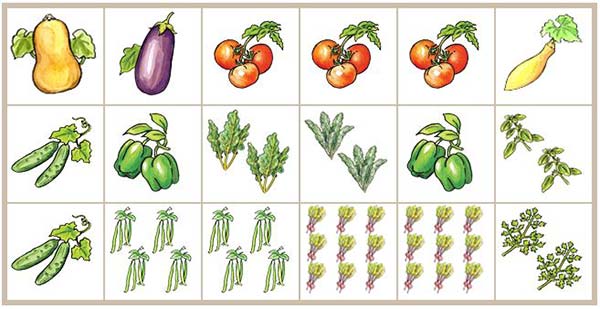
That depends on what you want your harvest to look like. Start by visualizing your ideal harvest. How much lettuce? How many tomatoes, radishes, peppers? If you want to grow large plants, like cabbage, cauliflower, and broccoli, know that each plant will take up an entire square foot, whereas onions, radishes and carrots only require 3 inches of space between each plant meaning that 16 plants will fit inside a single square foot. Creating a diagram will help you to visualize your garden; use this handy planting chart, graph paper or draw individual boxes by hand. If you would like to see some examples or design your own square foot garden you can visit gardeners.com were you can plan out your own square foot garden.
Now that you have a pretty good idea of what and how much to plant, it’s time to get your hands dirty! Below, we’ll use a step by step approach to square foot gardening to guide you through the process.
10 Steps to Square Foot Gardening:
1. Location is key: once you put in your garden, you will not be able to move it, so make sure that it gets enough sunlight (6-8 hours) and has well-drained soil. Avoid places in your yard where water tends to puddle or collect. Notice what trees and shrubs are nearby; a spot that is sunny in early spring might be shady in the summertime when leaves are fully filled in. Another factor to consider is proximity to the home. You will find that maintaining a nearby garden is easier than keeping up with a garden that’s relatively far away. Watering is particularly challenging when the garden is far from the house and worse, far from the spigot and hose. Gardens need to be watered daily.
2. Consider layout: You want to be sure that all sides of your garden are accessible so that you can easily water, add supports, check for pests, and harvest your produce. If you intend to build more than one square foot garden, position them in close proximity to each other to make daily maintenance more convenient, but not so close together that you cannot access all sides of each bed. Plan for aisles.
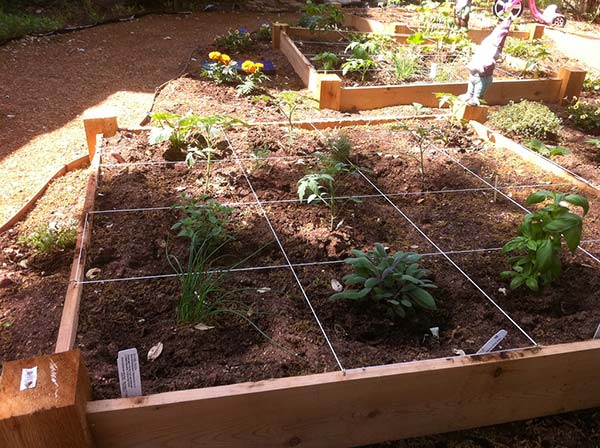
3. Build the frame: You can easily build a simple box frame out of untreated lumber. Be sure to use untreated wood because you do not want the chemicals in treated wood to seep into the soil and contaminate your fresh fruits, vegetables and herbs. A small raised bed will use 1’ x 6’ or 2’ x 6’ boards which can be cut to your specifications at little or no cost in most hardware stores. You want the sides of your raised bed to be 8-10” tall to discourage bunnies and other wildlife from traipsing through your garden and munching on your produce.
4. Once the lumber is positioned into a frame, use deck screws to secure the corners and landscaping cloth underneath the box frame to prevent weeds from growing in your garden. You can use a staple gun to secure the cloth around the perimeter of the frame.
5. Fill the box frame: You can purchase bags of garden soil and supplement this with bags of compost in a 3:1 ratio. Alternatively, we recommend a 1:1:1 ratio of peat moss, compost and vermiculite. The soil you use needs to provide adequate nourishment for your plants for the growing season, so use high quality, organic varieties whenever possible. Whatever you decide to use should fortify your plants and keep the soil aerated while retaining moisture.
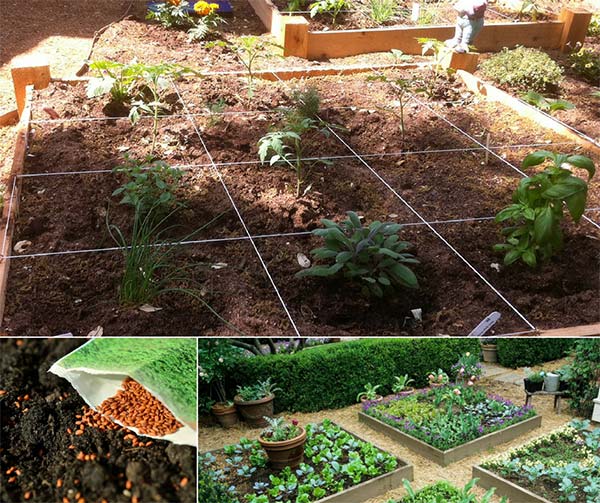
6. Form a grid: Section off 1 foot boxes within the wood frame. You can use almost any material as a place marker, such as rope, wood, string or plastic strips. We recommend hammering a small nail into the frame at 1’ intervals and tying twine to the nails. Secure the end of the twine to the nail opposite to form squares. The twine should hold up through the growing season and be easy to remove before winter. But really, anything that helps to demarcate boxes will be fine: bamboo poles, venetian blinds, an old rake handle, or some combination of these will all suffice.
7. Plan Your Garden: As we’ve discussed, mature plants come in a variety of sizes and you will need to plan accordingly. We can break it down to 4 sizes: small, medium, large and extra-large plants. You don’t need to know offhand which category any given plant falls into. Simply look at the growing instructions on the packet so see how much space you need between plants. This will tell you whether you will be able to fit 1, 4, 9 or 16 plants in each square foot of your garden. Simply put, if the seed packet suggests that you leave 3 inches between plants, then you can fit 16 plants per square foot. If the packet recommends 4-inch spacing, then you can fit 9 plants. For plants requiring 6 inches of space, you can plant 4 in each box and those requiring 12 inches of space can only fit 1 per square foot.
8. Start planting: Use your index finger to poke a shallow hole and deposit 1-2 seeds. Read the individual seed packets to determine how deep to make the holes. Cover the seeds loosely with soil, careful not to compact the soil too hard. You want water and air to be able to penetrate and reach the seed. In each square, consider inserting a popsicle stick with the name of the plant written in sharpie. You’ll be surprised by how difficult it is to remember what you planted where, despite all the planning that went into it.
9. Water daily: Once the seeds begin to germinate, you’ll need to water every day. They are exceedingly fragile in the beginning, so either water by hand or set the nozzle on the hose to “mist” to avoid bending the delicate stems of your seedlings. Try not to use cold water at first. Warm soil will help to promote growth, so use water that is room temperature if not a little bit warmer.
10. Harvest: Now comes the reward, eating the delicious fruits and veggies that you grew! Different crops mature at different times. You will probably enjoy your first garden snack in May or June when greens, peas and radishes begin to mature. In July and August, you can enjoy the peppers, tomatoes, squash, and other things. As spring crops complete their life cycle, dig them out by the roots, add new compost, and plant new seeds to enjoy a second harvest. This is called rotation “gardening.”